How Many Photos Should an Etsy Listing Have?

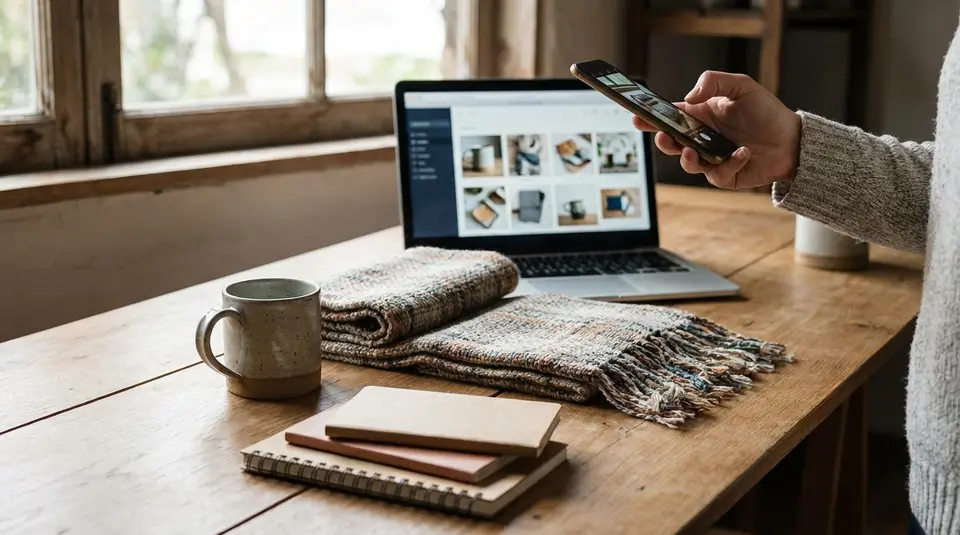
Etsy listing photos are your strongest sales tool because buyers decide in seconds whether to click, trust, and purchase. Etsy currently lets you upload up to 20 images, but the right number is usually the smallest set that answers every buyer question clearly, with five or more being a solid baseline for most products. Start with a clean, well-lit hero shot that reads at thumbnail size, then add detail close-ups (texture, finish, personalization), a true-to-scale photo (in hand or next to a familiar object), and any key options like color or size. The biggest missed opportunity is using extra slots for repeat angles instead of removing uncertainty.
Etsy listing photo limit and the minimum you should use
Current maximum photos per listing
As of now, Etsy lets you add up to 20 photos per listing (plus 1 short listing video). That is a big jump from the old 10-photo limit, and it gives you plenty of room to show details, scale, and options without cramming information into one image. Etsy confirms the 20-photo limit in its How to Create a Listing guidance.
Minimum photos to publish a listing
From a practical standpoint, you should treat 1 strong photo as the true minimum. You need a clear product image so buyers can immediately see what is being sold, and Etsy also expects listings to have at least one image for good search visibility.
That said, one photo is rarely enough to prevent questions like “How big is it?” or “What exactly arrives?” If you want fewer abandoned carts and fewer pre-sale messages, plan for several photos from the start.
Why using more slots can help sales
More Etsy listing photos usually helps because each image can remove one buying objection. Etsy explicitly notes that using multiple images may increase conversion since each additional image can give shoppers more information about the product, as explained in The Anatomy of a Well-Crafted Etsy Listing.
The best way to use extra photo slots is to add variety, not repetition. For example:
- A thumbnail-friendly cover photo (simple, well-lit).
- Close-ups for texture, materials, and craftsmanship.
- A scale shot (in hand, on a model, or next to a common object).
- Option clarity (colorways, personalization examples, sizing).
Ideal number of photos for higher Etsy conversion rates
Fast rule of thumb for most products
For most Etsy listings, aim for 8 to 12 photos. That usually gives you enough room to cover the basics without overwhelming shoppers. If you can only do one thing, focus on clarity over quantity. Each photo should answer a different buyer question.
A simple, high-converting set often looks like this: a clean hero shot, 2 to 3 alternate angles, 2 close-ups (texture, clasp, seams, engraving), 1 scale photo, 1 “what you get” photo (packaging or included items), and 1 photo that removes the biggest objection (measurements, finish options, care, or install).
Signs you need more images
You probably need more photos if you notice any of these patterns:
- You keep getting the same messages (“What size is it?”, “Is it shiny or matte?”, “Does it come as a set?”).
- Your item has variations that change the look (colorways, materials, sizes, left vs right, custom text).
- The product is tactile or detail-driven (fabric texture, wood grain, gemstone sparkle, engraving depth).
- The listing requires setup or context (printables, patterns, furniture hardware, digital files, kits).
- Your first photo looks great, but shoppers still hesitate because the listing feels “unknown” after the click.
In short: if the buyer has to imagine too much, add photos.
When fewer photos still works
Fewer photos can work when the product is extremely straightforward and standardized. Think: a single sticker design, a simple art print with clear sizing, or a basic supply where specs matter more than lifestyle shots.
Even then, try to include at least: a strong cover image, one close-up, and one scale or size reference. The goal is not to hit a magic number. It’s to make the purchase feel easy and low-risk.
Best Etsy photo size, file type, and technical requirements
Recommended pixel dimensions and aspect ratio
For crisp Etsy listing photos, Etsy recommends uploading images that are at least 2000 pixels wide and 2000 pixels tall (or more). Your first photo should be at least 635 pixels on each side so it does not appear lower quality in search. The simplest approach is to export every photo at 2000+ pixels on the shortest side, then keep your whole set consistent. Etsy’s current guidance is in its image requirements and best practices.
Aspect ratio is not a hard “rule,” but it matters for cropping. A 4:3 (landscape) or 1:1 (square) format tends to display cleanly across devices. Whichever you choose, stick with it so your gallery looks tidy and your product stays centered.
File formats, file size, and color profile
Etsy supports .JPG, .PNG, and .GIF for shop images. Animated GIFs are not supported, and transparency in PNGs can show as black. Etsy also notes that images larger than 1 MB may have trouble uploading, especially on slower connections.
If your colors look “off” after uploading, convert to sRGB before export. That is the safest color profile for consistent display online.
Keeping images sharp after Etsy compression
Etsy compresses images to improve loading speed, which can soften fine detail. To keep photos sharp:
- Start with a well-lit, in-focus original (compression cannot fix blur).
- Upload at 2000+ pixels, but avoid enlarging small originals.
- Export JPEGs at a high quality setting (often around 80 to 90), then check for halos or grain.
- Add only light sharpening before export, especially on texture-heavy items like fabric, engraving, or wood grain.
First listing photo best practices for thumbnails and search
Cropping and safe zones for the cover image
Your first Etsy photo does the hardest job. It has to look good as a tiny thumbnail in search and still hold up when buyers click in.
Compose with a “safe zone” in mind. Keep the product centered, and leave a little breathing room around the edges. Etsy may crop thumbnails differently across pages and devices, so avoid placing the most important details (like a pendant tip, a mug handle, or the edge of a print) right against the border.
Make sure the product is instantly readable. If you sell something small, zoom in enough that it is clear at a glance, but not so close that shoppers cannot tell what it is.
Background, lighting, and avoiding text overlays
A clean background and simple lighting usually converts better than a busy scene for the cover photo. Aim for soft, even light that shows true color and texture. Window light works well, and so do basic softboxes.
Avoid heavy filters. Etsy shoppers often return items when color or finish looks different in person, so accurate color matters.
Also, skip big text overlays on the first photo. They can be hard to read on mobile, and they often make the thumbnail look cluttered. If you need to share key info like “Set of 2” or “Personalized,” save that for a secondary image.
Consistent styling across your shop
Consistency builds trust fast. When your thumbnails look like they belong together, shoppers are more likely to click multiple listings and browse your shop.
Try to standardize a few choices: background color, crop distance, lighting style, and editing. You do not need every photo to match perfectly, but your first images should feel like part of the same brand.
Essential types of Etsy listing photos to include
Angle, detail, and scale shots shoppers expect
Most Etsy buyers want to feel like they have “handled” the item before they buy. The easiest way to do that is to cover three photo types: angles, details, and scale.
Start with 2 to 4 clean angle shots that show the full product from different sides. Then add close-ups that prove quality and answer common questions: stitching, clasp hardware, texture, print resolution, seams, engraving depth, or the back side.
Always include at least one scale photo. If it is wearable, show it on a person. If it is home decor, show it on a table or wall. If it is small, put it next to a familiar object, or include a ruler shot. Scale is one of the biggest causes of “not as expected” reviews, so this image earns its keep.
Lifestyle, packaging, and what arrives photos
Lifestyle photos help buyers picture the product in use. Keep them believable. A simple setting that matches your target buyer usually works best.
Also include a “what arrives” photo. Show exactly what is included in the purchase, especially if you sell sets, bundles, kits, or items with optional add-ons. If gift-ready packaging is a selling point, show the packaging clearly. If packaging varies, do not overpromise. Show a representative example and clarify in your description.
Personalization or made-to-order proof images
If your listing includes personalization, add at least one photo that makes customization feel safe. Good options include:
- A clear example of the personalization style (font, placement, size).
- A photo showing available choices (materials, finishes, colorways).
- A close-up that shows how readable the customization is in real life.
For made-to-order items, include a proof-style image that sets expectations: natural variation in wood grain, stone pattern differences, dye lot shifts, or hand-finished texture. This reduces misunderstandings and helps the buyer feel confident clicking “Add to cart.”
Photo planning for variations, colorways, and multiple items
Allocating photos across options without confusion
Variations are where Etsy listings often lose buyers. If shoppers cannot tell which photo matches which option, they pause, second-guess, and leave.
Plan your Etsy listing photos around decisions. Ask: what does the buyer have to choose on this listing? Size, color, material, finish, quantity, left vs right, personalization. Then assign photos to make each decision obvious.
A clean approach is:
- 1 cover photo that shows the “default” or best-selling option.
- 1 group photo that shows all options together.
- 1 photo per major option category (for example, all colorways in one frame, all sizes in one frame).
- 1 close-up that highlights the difference buyers actually care about (matte vs glossy, thin vs thick, smooth vs textured).
If you sell multiple items in one listing (like “set of 2” or “choose 1, 3, or 5”), include a photo that visually confirms quantity. Do not make buyers read fine print to understand what is included.
Showing each variation clearly with limited slots
Even with 20 photos available, you can run out of space if you try to show every option from every angle. Prioritize clarity over completeness.
Focus on:
- The options that change the look the most (color, material, finish).
- The options that affect fit or function (size, length, compatibility).
- The option that causes the most confusion (single vs set, digital vs physical, frame included or not).
If one option cannot be photographed honestly (like highly variable stones or one-of-a-kind patterns), show representative examples and set expectations in your description.
Using numbered labels and swatches in secondary images
Numbered labels and swatches can work well, but keep them subtle. Use them only on secondary photos, not the cover image.
A simple format is a clean grid of swatches with numbers, plus one real-product photo for each top seller color. Then match your variation names to the same numbers (for example, “01 Sage,” “02 Clay,” “03 Black”). This reduces mistakes and helps shoppers feel confident they selected the right option.
Using video and graphics without hurting your main product photos
When to add a listing video and what to show
Add a listing video when the product has movement, shine, texture, or a “feel” that photos cannot fully capture. Jewelry sparkle, fabric drape, how a bag opens, scale in hand, or a quick before-and-after for home items all benefit from video.
Keep it simple and product-first. Etsy listing videos play without audio, and you can add only one per listing, so treat it like a silent proof clip that builds trust. Etsy’s current specs allow a short clip and outline formats, size limits, and that audio is removed in its How to Add a Listing Video guide.
What to show in 3 to 15 seconds:
- A slow pan across the product for texture and finish
- The item in hand or on-body for scale
- One key action (open, close, flip, wear, hang, install)
Size charts and infographics in non-primary images
Size charts, measurement diagrams, and simple “how to order” graphics can reduce messages and wrong orders, especially for apparel, rings, downloadable prints, and personalized items. Keep them clean, readable on mobile, and consistent with your shop style.
Place these graphics in secondary slots, not the first photo. Your cover image should sell the product visually. The infographic should confirm details.
Avoiding duplicate photos and image fatigue
Using more photo slots is great, but repeating near-identical angles can make buyers scroll past without learning anything new. A good rule is: if two photos answer the same question, keep the stronger one.
Mix your gallery on purpose: one hero, a couple angles, a couple close-ups, scale, what arrives, options, and one “proof” image (measurements, personalization example, or materials). This keeps the listing informative without feeling bloated.
Related posts
Keep reading

How to Recover a Dead Etsy Listing
Revive dead Etsy listings with smart SEO, renewal timing, fresh photos and keywords that boost traffic, restore visibility and get your shop selling again.
How to Create a Private Etsy Listing as a Seller
Learn how to create private Etsy custom listings step by step, reserve items for one buyer only, manage custom orders, protect pricing, and boost shop sales.

How to Create an Etsy Listing Template (Faster Publishing System)
Etsy listing template workflow: duplicate a listing, set photos, variations, shipping profiles, and tag placeholders to publish faster, fewer errors in minutes.

How to Create On-Brand Etsy Listing Graphics (Without Overdesigning)
Etsy listing graphics that stay on-brand: clean text hierarchy, consistent colors and fonts, plus fast Canva templates for mobile-ready, uncluttered thumbnails.

How to Write an Etsy About Section That Sounds Credible (No Fluff)
Etsy About section tips for a trustworthy shop story: what to include, tone, proof details, and photo/video ideas plus common mistakes to avoid for buyer trust.

Etsy SEO Tips to Rank Higher in Search
Happy Etsy SEO tips for sellers: master keywords, titles, tags, photos, reviews, free shipping, and conversions to rank higher in Etsy search and boost sales.