How to Pack Handmade Items for Safe Delivery

Packing handmade items is about building a small, shock-absorbing “nest” so your work can survive drops, vibration, and rough sorting on the way to a doorstep. Start by wrapping each piece to protect its surface and weakest points, then choose a sturdy box that leaves room for cushioning while still keeping the item from sliding. Fill every gap with reliable void fill so nothing moves when you do a gentle shake test, and use double-boxing for anything truly fragile or one-of-a-kind. Seal seams with strong packing tape and keep moisture in mind with a simple inner bag or wrap when needed, because the most common breakages come from empty space, not impact alone.
Packaging materials that prevent damage during shipping
Box types for lightweight vs heavy handmade items
Lightweight handmade items usually do best in a new, rigid corrugated carton that is only slightly larger than the wrapped product. The goal is to prevent bending and crushing while keeping empty space to a minimum.
For heavier handmade items, step up the strength. Use a sturdy corrugated box with thicker walls, and avoid “reused” boxes that already have soft corners or crease lines. Heavy products act like a battering ram inside the package, so the box needs to resist both compression from the outside and momentum from the inside. If your item is dense (metal, stone, large ceramics), plan on a stronger outer carton and more structured cushioning (not just loose fill).
If you ship very small, lightweight goods (jewelry, pins, stickers), rigid mailers or small cartons can outperform a big box because they reduce flex and stop the item from sliding around.
Cushioning options and when to use each
Match the cushioning to the risk:
- Bubble wrap or foam sheets for fragile, breakable, or glossy surfaces. Wrap until the item feels “springy,” not hard.
- Kraft paper (crumpled) for void fill and light-to-medium protection. It is great for preventing shifting, but not enough alone for truly fragile pieces.
- Air pillows for filling large gaps in bigger boxes. Avoid using them as the only protection for sharp corners or heavy items.
- Molded inserts or custom cut foam when you need repeatable protection for the same product shape, or when the item is high value.
A simple test: if the item moves when you gently shake the sealed box, add more cushioning.
Tapes, labels, and seals that hold up in transit
Use pressure-sensitive packing tape (not gift wrap tape) and seal with the “H-tape” method across the center seam and both edge seams. Reinforce the bottom seam on heavier parcels.
For labels, use a full-coverage adhesive label or attach a paper label cleanly and flat. If you buy and print labels through Etsy, follow Etsy’s steps for downloading, printing, and attaching the label so buyers get accurate shipping notifications on the ship date you set in your order workflow (Etsy shipping label help).
Choosing the right box size and minimizing empty space
Measuring items and allowing room for padding
Start with the item fully prepared the way it will ship: wrapped, bagged (if needed), and protected at corners and edges. Then measure length x width x height at the widest points. Add room for padding on all sides. As a practical baseline, plan for about 1 to 2 inches of cushioning around fragile items. For sturdy items, you can often use less, as long as nothing can shift.
Avoid “just in case” oversized boxes. Extra space is not extra safety unless it is packed tightly with the right void fill. Too much empty space increases movement, which is one of the fastest paths to cracked corners, scuffed finishes, and crushed gift-style packaging.
If you are buying postage through Etsy, accurate package dimensions also matter for pricing and avoiding adjustments later. Enter the final, packed size and weight, not the product’s bare dimensions (Etsy shipping labels).
Poly mailers vs cartons for non-fragile goods
Poly mailers work well for soft, non-breakable items like fabric goods, some apparel, or flat textile accessories, especially when you want to keep shipping weight down. They also help with light moisture protection.
Choose a carton when you need structure. If an item can crease, dent, or get crushed (even if it will not “break”), a box is usually the safer choice. Many sellers use a hybrid approach: put the item in a clear inner bag for cleanliness, then place it in a poly mailer only if the item will still arrive looking crisp.
When double-wall boxes are worth it
Double-wall boxes are worth it when compression and impact risks are high. Common triggers include heavier packages, fragile materials, long shipping distances, or premium items where presentation matters.
They also make sense when you routinely see corner crush or top-down pressure damage. Upgrading the box can be cheaper than replacing orders, refunding shipping, and losing time on support messages. If you are shipping internationally or through peak holiday volume, stronger boxes can add a helpful margin of safety.
Wrapping and cushioning techniques for fragile handmade pieces
Individually wrapping parts and accessories
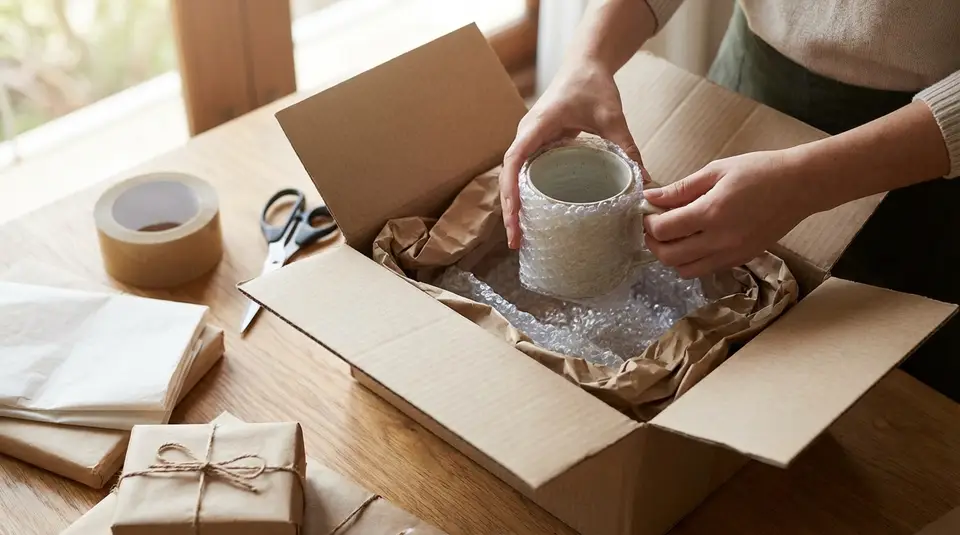
Fragile handmade items break most often at contact points. Handles, spouts, lids, clasps, and raised textures need their own protection.
Wrap each component separately before anything goes into the box. For example, pack a mug and its lid as two wrapped pieces, even if they ship together. Use a soft first layer (tissue, foam sheet, or clean kraft) to prevent scuffs, then add a thicker shock layer (bubble wrap or foam). Secure the wrap with a small piece of tape on the wrap itself, not directly on the product.
If your item includes accessories (care cards, small tools, spare parts), put them in a small pouch or envelope so they cannot rattle against the main piece.
Filling voids so items cannot shift
Void fill is not decoration. It is what stops momentum.
After you place the wrapped item in the box, fill every gap so the package becomes one solid unit. Pay extra attention to the corners and the space above the item, since boxes often get stacked. A quick check: close the flaps and gently shake. If you feel movement, add more fill.
For fragile work, crumpled kraft paper is usually more dependable than “fluffy” fill because it locks in place. Air pillows can help in larger cartons, but they should not be the only thing preventing movement.
Double-boxing for extra protection
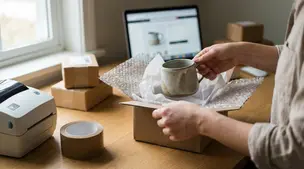
Double-boxing adds a second shock zone. Pack the item tightly in a smaller inner box with cushioning. Then center that inner box inside a larger outer box with padding on all sides.
This is especially useful for ceramics, glass, framed art, and anything with a delicate silhouette. Etsy also highlights setting up the right shipping supplies and workflow so you can pack consistently as order volume grows (How to Set Up a Shipping Workstation).
Nested boxes for delicate or high-value items
For very delicate or high-value pieces, think in layers: product wrap, inner box, then an outer carton with thick cushioning. Keep the inner box snug so it cannot “float” inside the outer box, and avoid mixing heavy add-ons in the same outer carton unless they are immobilized.
Packing handmade ceramics, glass, candles, and soaps safely
Ceramics and glass: edge and impact protection
Ceramics and glass fail at edges first. Protect rims, corners, feet, and handles with extra wrap before you build the main cushion layer. A soft first layer prevents scuffs on glazes and polished surfaces. Then add a thicker impact layer like bubble wrap or foam.
Aim for firm packing, not “floating.” Place the wrapped piece in the center of the box and lock it in place with tight void fill on all sides, including the top. If there is any movement, it is not done yet. For mugs, vases, and anything with protruding parts, double-boxing is often the simplest upgrade that actually reduces breakage.
Candles: heat, scent, and surface scuff prevention
Candles are less about shattering and more about heat and appearance. Keep the candle surface from rubbing by wrapping it in tissue or a clean soft sheet, then add a protective outer wrap. If the candle is in a glass vessel, treat it like glassware and cushion it accordingly.
To manage scent transfer, keep strongly scented candles in a sealed inner bag or wrap before boxing. In warmer months, choose packaging that reduces friction and keeps the candle stable so it cannot bang around and chip.
Soaps and bath items: leak-proof and moisture control
For soaps, bath salts, oils, and similar items, plan for both leaks and humidity. Use an inner bag or sealed pouch for anything that could seep, and separate it from paper inserts so your branding does not arrive stained.
Soaps can sweat in humid conditions, so breathable wrapping is sometimes better than fully airtight packaging, depending on the formula and cure. Whatever you choose, make sure the product is protected from rubbing, and keep it immobilized so corners do not get crushed in transit.
Labeling packages correctly and adding paperwork inside the box
Clear recipient and return address placement
Place the shipping label on the largest, flattest surface of the box or mailer. Keep it away from seams, edges, and corners so it cannot peel up or get folded during sorting. If you have to tape over a paper label, use clear tape sparingly and keep it smooth so barcodes stay scannable.
Always include a clear return address. It is your safety net if the carrier cannot deliver. When you buy labels in Etsy, you can confirm the “Ship from” and “Ship to” addresses before purchasing, which helps catch missing apartment numbers and typos that cause delays (How to Purchase Shipping Labels on Etsy).
Inside the package, add a small card with the buyer’s name, order number, and your shop name. If the outer label is damaged, that internal ID can help the carrier or the buyer reconnect the package to the right order.
Fragile labels and handling notes that help
“Fragile” stickers can be worth using, but they are not a substitute for proper cushioning. Think of them as a small nudge, not a guarantee. If you use handling notes, keep them short and standard, like “Fragile” or “This Side Up,” and place them near the label where they are easy to see.
A more reliable approach is structural: immobilize the item, reinforce corners, and use double-boxing when needed. That is what actually prevents breakage when a box is dropped or stacked.
Packing slips, care cards, and thank-you notes
Include a packing slip when it helps the buyer confirm what arrived, especially for multi-item orders or gift purchases. Etsy lets you print packing slips from your Orders page, and you can customize what details appear so the slip fits your brand and the situation (Packing Slips and Order Receipts for Sellers).
Care cards reduce post-delivery issues. Add simple, specific handling and cleaning instructions, plus any safety notes that apply (for example, candle burn guidance or “not dishwasher safe” for certain finishes). Keep thank-you notes short, and consider adding a single, clear line about how to contact you on Etsy if anything arrives damaged.
Shipping options, tracking, and insurance for handmade orders
Choosing carriers and service levels by delivery speed
For most Etsy sellers in the US, the main carrier choices are USPS, UPS, and FedEx. The “right” service level comes down to how fast the buyer needs it and how well the package can handle handling.
If delivery speed is the priority, choose an express service and pack as if the box will be handled quickly and stacked often. If cost is the priority, a ground service can be a great fit, but it usually means more days in transit. That increases the value of tight packing and strong boxes.
When you buy shipping labels through Etsy, you can compare service options based on the package details you enter (size, weight, destination). Tracking is included automatically on Etsy labels, which makes order updates smoother for both you and the buyer.
When insurance and signature confirmation make sense
Insurance is most useful when the replacement cost would hurt. Think one-of-a-kind pieces, higher-priced orders, and fragile work like ceramics and glass. It is also smart when you cannot easily remake the item quickly.
Signature confirmation can help for high-value orders or addresses where packages are frequently stolen. It can also reduce “delivered but not received” disputes, but it can frustrate buyers who are not home. Consider offering it as an upgrade on expensive items.
If you purchase labels on Etsy, you can add optional shipping insurance during the label purchase flow, and Etsy explains how coverage and claims work in Insurance and Claims for Shipping Labels.
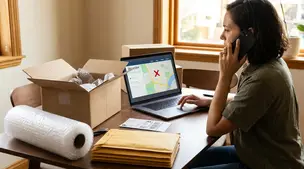
Sharing tracking details and managing delivery issues
Make tracking part of your customer service routine. Etsy notifies buyers based on the ship date you set, so set that ship date for the day you will actually hand the package to the carrier. When tracking shows delays, send a short message that confirms the latest scan and what you will do next.
If an order looks stuck, first confirm the address, then encourage the buyer to watch for carrier notices, check with household members, and contact the local delivery office. Etsy’s steps for adding tracking and completing orders are in How to Add Tracking and Complete an Order.
Returns and damage claims: what to document and how to respond
Photo proof and packaging documentation
When a buyer reports damage, your first goal is to understand what failed: the item, the inner wrap, the void fill, or the outer carton. Ask for clear photos in good light, ideally:
- The damaged item from multiple angles (close-up and full view)
- The item as it was unpacked, before anything is thrown away
- The inside of the box showing cushioning and empty space (if any)
- All sides of the box, including corners and any crush points
- The shipping label area (to match the package to the order)
This documentation helps you decide whether the issue was impact, shifting, or compression, and it can be important if Etsy needs details for a case under Etsy’s Purchase Protection for sellers.
Replacement, repair, and refund workflows
Keep your workflow simple and consistent so you can move fast without making promises you cannot keep.
- Confirm the buyer’s preferred resolution: replacement, repair, or refund.
- Set a timeline in writing in Etsy Messages: when you will ship the replacement or issue the refund.
- Avoid unnecessary returns for shattered items unless you truly need the piece back. If you do require a return, be specific about how to re-pack it safely.
- If you reship, pack as if you are shipping to yourself. Upgrade materials, not just the box size.
Updating packing methods after a damage report
Treat each damage report like a free stress test of your packaging. Note what changed between “safe” deliveries and the failed one.
Common upgrades that reduce repeat damage:
- Add corner and edge reinforcement on ceramics and glass
- Switch from loose fill to tighter paper or foam bracing
- Reduce empty space by downsizing the box
- Double-box the same item type going forward
- Separate accessories so they cannot strike the main piece
Make one change at a time when possible. That way you can tell what actually fixed the issue.
Related posts
Keep reading
How to Create Care Instructions for Handmade Items on Etsy
Care instructions for handmade items: clear wording, material-specific washing and safety notes, and where to add them in Etsy listings and packaging inserts.
How to Handle “Item Not Received” Cases on Etsy
Learn how to prevent and resolve Etsy “item not received” cases with clear policies, tracking, buyer communication, refunds, and Purchase Protection tips.

How to Handle Out-of-Stock Items on Etsy Without Losing Momentum
Out-of-stock items on Etsy: keep sales steady with smart restock timing, renew vs deactivate choices, and clear buyer messages that protect search visibility.

Trademark and Copyright on Etsy: How to Avoid Infringement
Trademark and copyright on Etsy: check names, tags, logos, and artwork, confirm licenses, and understand takedown notices before listing your products safely.
Shipping Insurance for Etsy Orders: Is It Worth It?
Discover when Etsy shipping insurance truly pays off, comparing seller protection, USPS coverage, Shipsurance rates, order value risks, and smart refund peace-of-mind.
Should You Require Signature Confirmation for Etsy Orders?
Learn when to require signature confirmation for Etsy orders to prevent package theft, protect high-value shipments, keep tracking valid, and boost buyer trust.