Best Packaging Supplies for Etsy Sellers

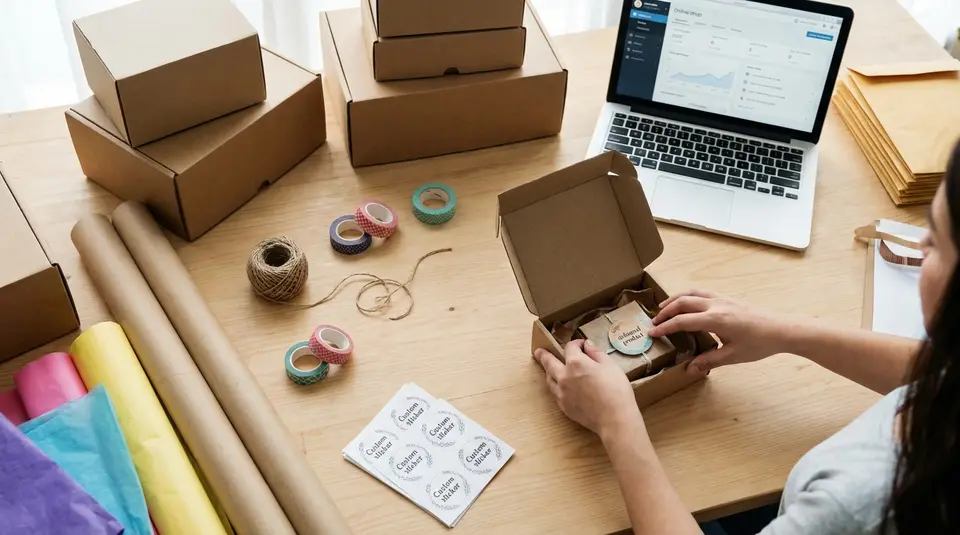
Packaging supplies are the quiet workhorses behind smooth Etsy fulfillment, protecting your product in transit while shaping the unboxing experience buyers remember. The best setup starts with choosing the right outer container for what you sell, like rigid mailers for prints, bubble mailers for small breakables, or corrugated boxes for anything that can’t be bent or crushed. Add smart cushioning and sealing basics, such as kraft paper or paper void fill, a strong tape, and a clear shipping label that won’t peel off during handling. Then keep it simple but intentional with tissue paper or a small branded insert, because the most common packaging “upgrade” mistake is spending on looks before sizing and protection are dialed in.
Packaging supplies to protect common Etsy product types
Mailers, boxes, and envelopes
For most Etsy shops, your core packaging supplies start with picking the right outer container for what you sell and how it ships. The goal is simple: protect the item, avoid damage claims, and keep shipping costs predictable.
- Rigid mailers (stay-flat) are ideal for prints, stickers, and paper goods that must not bend. Pair them with a clear sleeve or glassine bag to prevent scuffs.
- Padded mailers work well for small, durable items like jewelry boxes, keychains, or small craft supplies. Use them when the product can handle light compression.
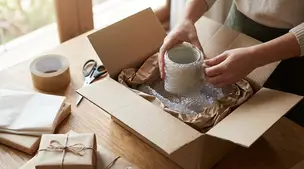
- Corrugated boxes are the safest choice for anything fragile, bulky, or crushable, like ceramics, candles in glass, or multi-item orders. They also help when you need clean edges for stacking.
- Envelopes are best reserved for low-value, flexible items. If the product can crease, skip standard envelopes and move up to rigid mailers.
If you offer upgrades like gift packaging, keep your “gift look” separate from your “shipping protection.” Many products need both an inner presentation layer and a tougher outer shipper.
Cushioning and void fill
Cushioning is what turns a box into real protection. Your aim is to stop movement, absorb drops, and prevent rubbing. Keep a few reliable options on hand so you can match the fill to the item.
Common Etsy-friendly choices include kraft paper, corrugated wrap, packing paper, and bubble wrap for higher-risk shipments. For boxes, use enough void fill so the item cannot shift when you gently shake the package. For mailers, focus on surface protection so corners do not poke through.
A practical baseline: if it’s breakable, assume it will be dropped. If it’s scuff-prone (painted, glazed, glossy, or resin), assume it will rub.
Wraps and sleeves for fragile items
Wraps and sleeves prevent scratches and chips, especially on handmade items where surface flaws are easy to notice. Use clear poly bags, glassine bags, or tissue to keep finishes clean, then add a protective wrap based on fragility.
For fragile Etsy products:
- Ceramics and glass: wrap the item first, then cushion the edges and corners, then immobilize it in a snug box.
- Candles and cosmetics: sleeve to prevent label scuffs, then cushion to protect lids and glass.
- Jewelry: protect chains and clasps from tangling with small bags or pouches before placing the piece in a box.
Whenever possible, choose wraps that match your brand and packing speed. A simple, repeatable wrap method beats a complicated setup that is hard to do consistently during busy weeks.
How to choose the right shipping box size and mailer
Measuring products and choosing inner packaging
Start with the product, not the box. Measure your item at its widest points, then decide what inner packaging it needs (sleeve, wrap, padding, or an inner box). Only after that should you pick the outer shipper. This avoids the two most common Etsy packing problems: oversized packages that cost more to ship, and tight packages that crush corners or rub finishes.
A simple way to think about it:
- Surface protection first (sleeve, tissue, poly bag, glassine) to prevent scuffs.
- Impact protection next (bubble wrap, paper padding, foam) for drops.
- Movement control last (void fill) so nothing shifts.
Keep a small “test pack” routine. Pack one order like normal, close it, and gently shake it. If you feel movement, size down the box or add void fill.
Etsy also recommends keeping basic measuring tools and packing supplies on hand as part of an efficient shipping setup, which helps you package consistently as order volume grows. A handy reference is Etsy’s How to Set Up a Shipping Workstation.
Box strength and crush resistance basics
Not all corrugated boxes are equal. For heavier items, fragile products, or anything shipping long-distance, you generally want a box that resists crushing and keeps its shape when stacked.
Look for signs of strength like thicker corrugate, sturdy flaps, and manufacturer markings that indicate the box’s rating. As a rule, the heavier the item and the more empty space inside the box, the stronger the box should be. Also match tape to the job: light-duty tape on a heavy box is a common failure point.
When to use poly mailers vs boxes
Use poly mailers when the item is soft, non-fragile, and not easily creased, like T-shirts, fabric goods, or sturdy pouches. They’re lightweight and often reduce shipping cost.
Use a box when the product can crack, dent, melt, or bend (ceramics, candles in glass, framed art), or when you need reliable corner protection. If you’re unsure, box it. The extra protection usually costs less than replacing an order and managing a damage case.
Branding supplies that make orders look professional
Logo stickers, labels, and stamps
Branding supplies should make your packages look consistent without slowing packing down. For many Etsy sellers, the easiest “professional” upgrade is a small set of logo stickers in one or two sizes. Use a larger sticker to seal tissue paper, and a smaller one for a product bag or thank-you card.
If you ship a lot, consider custom labels (your shop name, return address, or “fragile” notes) instead of handwriting the same details repeatedly. Labels look clean, reduce mistakes, and save time.
Rubber stamps can be a budget-friendly option for kraft boxes and paper mailers, especially for a simple logo mark or a “thank you” stamp. They work best when you can stamp on flat surfaces before packing. If you choose stamps, keep an ink pad dedicated to packaging so it does not dry out mid-rush.
Branded tissue paper and tape
Branded tissue paper and tape can look great, but they should be your second wave of upgrades, not your first. The risk is spending money on aesthetics while protection is still inconsistent.
For most shops, plain tissue in a brand color (or clean kraft tones) reads polished and keeps costs under control. Branded tissue is most worth it when you ship enough volume to justify a larger order and you want the unboxing to feel uniform.
With tape, prioritize performance. A strong packing tape plus one small “brand moment” (like a sticker seal) usually looks better than fully branded tape that does not stick well in cold or humid conditions.
Inserts and business cards
Inserts should be helpful, brief, and on-brand. A simple business card or small thank-you card is usually enough. If your products need it, add a care card (jewelry care, washing instructions, candle safety) so buyers get better results and fewer issues.
Avoid bulky flyers. Etsy buyers often appreciate minimal packaging, and too many extras can feel like clutter. Aim for one clean insert that supports repeat purchases, such as a care tip and a reminder to reach out if anything arrives damaged.
Unboxing extras that delight customers without adding clutter
Thank you notes and care instructions
The best unboxing extras are the ones that make the order easier to enjoy. A short thank you note can feel personal without turning into “stuff.” Keep it to one or two sentences, then point buyers to what matters: how to use, wear, wash, or store the item.
Care instructions are especially valuable for Etsy products that are handmade, delicate, or material-specific. Think jewelry that can tarnish, knitwear that needs gentle washing, candles that need safe burn guidance, or prints that should be kept dry. A small care card reduces avoidable problems and can also cut down on messages later.
If you want to add a professional touch, include one clear line about support, like “If anything arrives damaged, message me and I’ll help.” It sets expectations without sounding corporate.
Gift wrap options and add-ons
Gift options work best when they are clear, repeatable, and easy to fulfill fast. A simple system usually wins:
- One gift wrap style (tissue + ribbon or twine + a gift note).
- One gift message format (printed or neatly handwritten).
- One upgrade price that covers the extra materials and time.
Also make sure your gift presentation still ships safely. “Gift-ready” does not mean “ship-ready.” Many sellers use a gift box or wrapped inner package inside a sturdier shipping box or mailer so it arrives looking the way the buyer expects.
On Etsy, it helps to describe exactly what your gift wrap includes, since buyers often assume different things when they see “gift wrap” at checkout.
Freebies and samples rules of thumb
Freebies can be a nice surprise, but they should never create confusion or waste. A good rule is to only include freebies that are directly related to your shop and unlikely to be thrown away immediately, like a small sticker for a stationery brand or a color swatch for a yarn shop.
A few practical guidelines that keep freebies from backfiring:
- Keep it small and lightweight so shipping costs and packing time stay predictable.
- Avoid anything scented or messy unless your whole brand is built around it.
- Do not include food or anything that could trigger allergy concerns.
- Make it clearly a bonus, not part of the purchased item, so buyers do not think something is missing from the listing.
When in doubt, skip the freebie and invest in cleaner packing, better protection, and a simple care card. Those upgrades tend to improve reviews more reliably.
Eco-friendly packaging supplies shoppers recognize and trust
Recycled paper, kraft, and paper mailers
If you want eco-friendly packaging that most customers instantly understand, start with recycled kraft and other paper-based options. They’re familiar, easy to sort at home, and they still perform well for many Etsy orders.
Good staples include recycled kraft boxes, paper mailer boxes, and rigid paperboard mailers for items that can’t bend. For cushioning, recycled packing paper and corrugated paper wrap are simple upgrades that still feel “on brand” for handmade goods.
If you’re a US-based Etsy seller, Etsy also offers discounted sustainable packaging through its Planet-Friendly Packaging program, which focuses on packaging made from responsibly sourced or recycled materials that buyers can typically recycle at home. The details are in Etsy Help’s Planet-Friendly Packaging.
Compostable mailers and plant-based fill
Compostable mailers can be a fit for soft goods, but be careful with how you describe them. Many “compostable” materials are designed for industrial composting, not backyard compost piles. In the US, environmental marketing claims like “compostable” are expected to be backed by evidence and qualified if most buyers can’t realistically compost the package where they live. The FTC’s Green Guides summary explains this in plain language.
For void fill, paper-based options are usually the safest eco-friendly bet. If you use plant-based packing peanuts, confirm they dissolve in water and store them somewhere dry.
Reuse and minimal packaging strategies
The most reliable sustainability win is often less packaging, not fancier packaging. Right-size your mailers and boxes, avoid double-boxing unless it’s truly fragile, and choose a packing method you can repeat consistently.
Reusing clean boxes and packing paper can also work well for Etsy, especially if you add a small note like “Reused packaging to reduce waste” so it feels intentional, not sloppy.
Where to buy packaging supplies in the US
Bulk buying and storage considerations
Bulk buying usually lowers your per-order packaging cost, but only if you choose sizes you’ll actually use. Before you order 500 boxes, look at your last 20 to 50 Etsy orders and identify your “top 2” box or mailer sizes. Start there.
Plan storage the same way. Flat-packed boxes take less room, but they still add up. Keep your active sizes within arm’s reach, and store overflow in a clean, dry spot so mailers do not warp and tape does not lose stickiness. If your shop is small, buying “one case per size” is often a sweet spot: enough to get a discount, not enough to bury your workspace.
Also think about consistency. Using fewer packaging sizes makes packing faster and reduces mistakes when you’re printing labels and moving quickly.
Online marketplaces vs packaging wholesalers
Online marketplaces are convenient for testing new supplies, replacing a size you ran out of, or ordering specialty items like rigid mailers or specific sticker paper. The tradeoff is that pricing can vary a lot, and listings can change.
Packaging wholesalers tend to be better when you’ve standardized your shipping supplies and want reliable restocks, case pricing, and consistent dimensions. They’re also a good option if you need plain corrugated boxes, kraft paper, or void fill in volume. The key is to compare the true “landed cost,” including shipping fees and minimum order requirements.
Shipping supplies you can get locally
Local options can save time when you’re in a pinch. Office supply stores often carry basic boxes, tape, and label sheets. Big-box retailers can be helpful for bubble mailers, packing tape, and simple padded envelopes.
For USPS shippers, it’s also worth knowing that Priority Mail and Priority Mail Express branded boxes and envelopes are available at no cost when used with the matching service. You can order many of them online through USPS Free Shipping Supplies or pick them up at many Post Office locations.
Packing and shipping workflow that saves time per order
Simple packing station setup
A fast Etsy shipping workflow comes from reducing steps, not rushing. Set up your packing station so the items you touch most are the closest to you, and everything has a “home.”
At minimum, aim for:
- A clear table or counter with enough space to assemble a box and wrap an item.
- A small bin system for your two to four most-used box and mailer sizes.
- One spot for cushioning (paper, bubble wrap, corrugated wrap) so you are not hunting for it mid-pack.
- Tape dispenser, scissors, and a marker within arm’s reach.
- A postal scale and a ruler or tape measure.
- A label printer or label sheets stored flat and clean.
If you use Etsy Shipping Labels, keep your printer and labels at the same station as your packing materials. It prevents the back-and-forth that eats time on every order.
One-page packing SOP template
A one-page SOP (standard operating procedure) helps you pack consistently, even on busy days. Keep it printed at your station. Update it when you change packaging sizes, add gift wrap, or introduce a fragile product line.
Use this as a simple template you can copy into a doc:
Packing SOP (Etsy Orders)
Shop: ________ Date updated: ________
- Check order details (personalization, gift message, add-ons)
- Pick item(s) and inspect for defects
- Prep inner packaging (sleeve, tissue, poly bag, care card)
- Cushion/wrap to product standard (fragile vs non-fragile)
- Choose shipper size (Mailer ___ / Box ___)
- Add void fill so nothing moves
- Seal package (tape pattern: one strip / H-tape for boxes)
- Weigh and measure package
- Buy and print label in Etsy
- Attach label and double-check address + service
- Photo proof (optional): label + packed order for records
- Store in “ready to ship” bin by carrier/service
Steps from pick to label to drop-off
For daily use, keep the workflow in one straight line:
Pick and inspect, then pack the product, then close the package, then weigh and label, then move it to a single outgoing bin. Try not to print labels first if your package weight or size might change, since that creates rework.
When you’re ready to drop off, do a quick final scan: correct label, clean barcode, and no old stickers showing. If you schedule carrier pickups, set a cutoff time on your Etsy processing routine so orders do not pile up and break the system.
Related posts
Keep reading

Google Ads for Etsy Sellers: When It Works Better Than Marketplace Ads
Google Ads for Etsy sellers can outperform Etsy Ads for niche, high-intent keywords and repeat buyers; weigh CPC, offsite fees, and tracking limits first.
California Prop 65 Basics for Etsy Sellers (When Warnings Apply)
California Prop 65 for Etsy sellers: when warnings apply, which materials commonly trigger them, and where to place a clear-and-reasonable notice online.
Holiday Shipping Deadlines for Etsy Sellers (Planning Guide)
Holiday shipping deadlines guide for Etsy sellers with USPS, UPS, FedEx cutoff dates, processing times, packaging tips, and planning strategies to avoid late deliveries.
Business Cards for Etsy Sellers: What to Print (and What to Avoid)
Business cards for Etsy sellers: smart basics like shop link or QR code, logo, and socials, with cardstock tips and pitfalls like clutter and pushy review asks.

Etsy Refund Requests: How to Reply Without Escalating
Etsy refund requests: respond calmly with policy-based wording, options for returns or partial refunds, and clear next steps to prevent cases and chargebacks.
How to Pack Handmade Items for Safe Delivery
Pack handmade gifts like a pro with sturdy boxes, eco-friendly cushioning, snug wrapping, and clear labels to prevent cracks, crushes, and costly shipping damage.