How to Use Listing Videos to Increase Etsy Sales

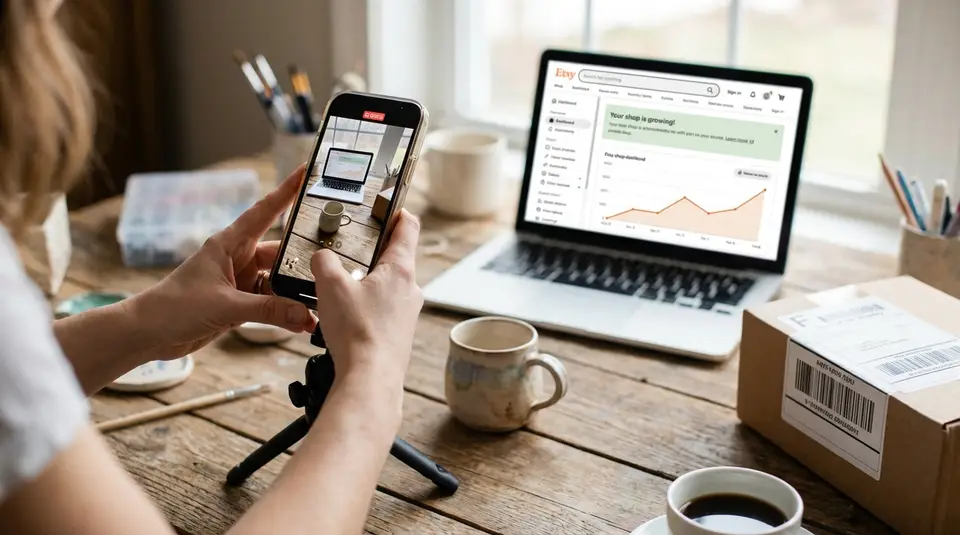
Etsy listing videos are short, silent clips that sit alongside your photos and help shoppers understand what they’re buying faster. Used well, they build buyer confidence, reduce guesswork about size and finish, and can make your product feel more “real” in a crowded search result. Because you only get one video per listing and it plays without audio, focus on clear visuals: a steady close-up sweep, a quick in-use demo, and an angle that shows scale in someone’s hand. The surprising part is that the biggest lift often comes from filming the most boring moment sellers skip: the one that answers a buyer’s unspoken doubt.
Why Etsy listing videos boost clicks and conversions
Better product context and buyer confidence
A good Etsy listing video answers the questions shoppers struggle to solve from photos alone: “How big is it?” “What does it look like in real light?” “Is it sturdy?” In a few seconds, video can show scale in a hand, how a clasp works, or how a fabric drapes. That extra context reduces uncertainty, which is one of the biggest reasons people hesitate before buying online.
Videos also help set expectations. When you show a quick 360-degree view or a close-up of texture, buyers feel more confident that the item will match what arrives in the mail. Over time, that clarity can lead to more completed checkouts and fewer “just checking” messages.
More engagement signals on listing pages
On an Etsy listing page, shoppers make fast decisions. If your video helps them understand the product sooner, they are more likely to stay on the page long enough to read key details like sizing, materials, processing time, and personalization options.
That matters because stronger listing engagement often shows up as practical outcomes sellers care about: more favorites, more adds-to-cart, and more serious buyers reaching out with specific questions instead of generic ones. Even when a shopper does not buy immediately, a compelling video can improve the chance they come back and purchase later.
Stronger differentiation in competitive search results
In many Etsy categories, shoppers see dozens of similar thumbnails. A listing video gives you an extra “proof” element that competitors may skip. It is a simple way to make your product feel more tangible, especially for items where craftsmanship, finish, and quality are hard to judge in a still image.
The goal is not flashy editing. It is clear demonstration. When your video highlights one or two unique selling points, like smooth stitching, a true-to-life color shift, or a satisfying functional detail, it can be the difference between a click on your listing and a click on the next one.
Etsy listing video requirements: length, size, and formats
Video length limits and aspect ratios
Etsy listing videos are meant to be quick. Etsy allows videos that are 3 to 15 seconds long. If you feel like you need more time, tighten the clip instead of trying to tell the whole story. A strong listing video usually shows one clear thing: scale, sparkle, texture, or how the item works.
For framing, Etsy recommends an aspect ratio of 2:1 (wide) or 1:2 (tall). In practice, this means both horizontal and vertical phone videos can work, as long as the important details stay centered and readable once Etsy crops and displays the video.
File formats, resolution, and file size basics
On the technical side, Etsy is flexible. Listing videos can be up to 100 MB, and Etsy accepts several common file types, including MP4 and MOV (plus formats like FLV, AAC, AVI, 3GP, and MPEG). You can confirm the current list on Etsy’s official guide to adding a listing video.
For quality, Etsy notes a minimum resolution of 500px, with an ideal resolution of at least 1080px. If your upload fails, it is often a size issue (too large) or a format/codec issue (especially with videos exported from certain editing apps).
Sound on Etsy videos and what to do instead
Etsy listing videos do not play audio. Any sound you record will be removed after upload. Plan for silent viewing:
- Use clear, steady visuals that explain the product without narration.
- Add key details in your listing photos (simple text overlays) and description, not in the video soundtrack.
- If sound would normally “sell” the item (like a zipper or clasp), show the action clearly and close-up instead.
Filming an Etsy listing video with a phone
Lighting, background, and staging that sells
Your phone can capture a great Etsy listing video if the lighting is clean and consistent. Aim for soft, bright light that shows true color and surface detail. A window with indirect daylight works well, or a basic lightbox setup for small items. Avoid mixed lighting (window light plus warm indoor bulbs) because it can shift colors and make materials look “off” compared to your photos.
Keep the background simple. Use a plain surface that contrasts with the product so edges and shape read instantly. Then stage just enough to communicate use and scale. For example, a candle on a tray in a tidy corner, or earrings next to a jewelry dish. If the styling competes with the product, it is too much.
Stable shots, framing, and focus tips
Stability is the quickest quality upgrade. Prop your phone on a small tripod, stack of books, or a mug and clamp. Turn on grid lines so you can keep the item centered and level. Before you record, tap to lock focus and exposure if your camera app allows it. That prevents the brightness from “pumping” when your hand moves.
Frame for Etsy’s crop. Leave a little breathing room around the product, and keep the most important detail in the center. If your item has a key feature, like engraving, stitching, or a clasp, record a second clip that starts wide and ends with that detail filling the frame.
Simple on-camera movement that shows scale
A listing video does not need fancy motion. It needs motion that communicates reality. Try one of these simple moves:
- Slow tilt: Start at the top and tilt down to show length or full shape.
- Gentle rotation: Turn the product 180 to 360 degrees to show depth and finish.
- In-hand scale shot: Hold the item briefly so buyers can judge size. Keep your hand still and the background plain.
- One functional action: Open the zipper, fasten the clasp, flip the pages, or show a drawer sliding, then stop.
Keep each move slow. If you cannot do it smoothly, move the product instead of the phone. The goal is a calm, easy-to-read clip that makes shoppers think, “Okay, I get it.”
What to show in your Etsy listing video
Product-in-use and lifestyle moments
The fastest way to make an Etsy item feel “real” is to show it being used the way your buyer imagines. A mug in someone’s hand, a hair clip going into hair, a print being hung, or a pouch sliding into a tote gives instant context. Keep the scene simple and true to the product. Shoppers are looking for clarity, not a cinematic story.
Lifestyle moments work best when they highlight one benefit. For example: “fits in a pocket,” “sparkles in daylight,” or “looks polished on a desk.” If your item is a gift, include a quick shot of the packaging and how it presents when opened.
Close-ups of quality, texture, and key details
Use close-ups to prove the details that justify your price. Show stitching, edge finishing, engraving depth, knit texture, glaze variation, or wood grain. If your product has moving parts, show them up close too, like a hinge, clasp, zipper, or swivel.
Two quick rules help here: keep the clip steady, and fill the frame with the detail. If the camera struggles to focus, pull back slightly, tap to focus, then slowly move in until the texture looks crisp.
Answering common buyer questions visually
Your Etsy messages and reviews already tell you what buyers worry about. Use video to answer those questions without needing extra text.
A few high-impact examples:
- Size and scale: show the item in hand, next to a ruler, or worn on a person.
- Color and shine: tilt the item to show finish (matte vs glossy) and how it reflects light.
- Thickness and sturdiness: show the side profile, or a gentle flex if the material is meant to bend.
- How it works: demonstrate the closure, refill, installation step, or how personalization appears on the finished piece.
- What’s included: lay out the set clearly if buyers might assume more or less comes in the order.
If you can only include one thing, prioritize the moment that prevents a wrong assumption. That is often what turns a scroll into a confident purchase.
Category-specific video ideas shoppers respond to
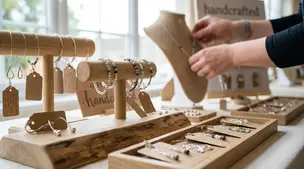
Jewelry, accessories, and wearable scale
For jewelry and wearables, shoppers mostly want scale and movement. A necklace can look perfect in a flat lay and still surprise someone once it’s on. Use your Etsy listing video to remove that guesswork.
Strong video ideas:
- Wear test: show earrings on ears, a ring on a finger, or a bracelet on a wrist. Include a quick side angle so thickness is clear.
- Movement and sparkle: tilt slowly in daylight to show how stones, metal, or beads reflect.
- Closures and comfort: demonstrate the clasp, adjustable chain, or backing type, then pause so buyers can see the hardware.
- Scale cue: hold the item in your palm for one second, then switch to the worn shot.
If you sell hair accessories, film the “before and after” of it placed in hair. Keep it tight and simple so the clip stays readable at a glance.
Home decor and gifts in a real space
Home decor sells better when buyers can picture it in a room. A short lifestyle clip gives instant context for size, finish, and vibe. Think: one clean corner, one surface, one product.
Strong video ideas:
- In-room scale: show the item on a shelf, table, or wall, then step slightly closer to reveal details.
- Lighting reality: a slow pan in natural light to show true color and texture (especially for ceramics, wood, and textiles).
- Gift presentation: a quick unboxing-style reveal of packaging, then the item in hand to show scale.
For prints and wall art, include a moment that shows the edge and surface. Buyers often wonder if it’s a print, canvas, or something else.
Vintage and supplies: condition and dimensions
Vintage shoppers want transparency. Supply buyers want precision. Video is perfect for both because it can show what photos sometimes hide.
Strong video ideas:
- Condition sweep: a slow 360-degree turn, then a close-up pass over any wear, patina, chips, or scratches. If there’s damage, show it clearly.
- Function check (when relevant): demonstrate that a clasp closes, a lid fits, a drawer slides, or a tool moves as expected.
- True dimensions: show length/width with a ruler or tape measure in frame, then flip the item to show depth or thickness.
- Supplies count and variety: spread items out to show quantity, color range, or lot consistency, then gather them to show what arrives as one order.
The goal with vintage and supplies is simple: make it easy for a careful buyer to say “yes” without needing to message you first.
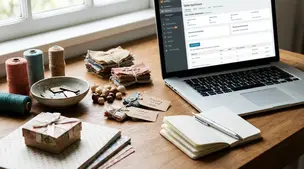
Uploading and placing listing videos for maximum impact
Adding a video to a listing on Etsy
Upload is straightforward, but it’s worth doing it intentionally so the video supports your best photos.
On Etsy.com, go to Shop Manager, then Listings, open the listing, and in the Photos and video area select the blank video slot and upload your clip. The Etsy Seller app has the same idea: open the listing and choose Add a video under Photo and video. Etsy’s step-by-step walkthrough is in How to Add a Listing Video.
After upload, watch it back on your live listing. Make sure it loads quickly, stays sharp, and clearly shows the product within the first second.
Choosing a thumbnail that earns clicks
Treat your video like it’s competing in search. Shoppers decide fast, and the first impression matters. The simplest way to “choose a thumbnail” on Etsy is to design the video so the opening frame is your best hero shot.
Aim for:
- A centered product with clean lighting
- A clear scale cue (hand, worn shot, or common object)
- No fast movement at the start (it can look blurry in previews)
If your first second is messy, refilm or trim so the video starts strong.
Pairing video with photos, titles, and tags
A listing video is not a replacement for photos. It’s the proof layer that reinforces them. Use photos for the full set of angles, sizing graphics, and variants. Use video for what still images struggle with: shine, texture, depth, and “how it works.”
Also keep the promise consistent. If your title and tags emphasize “dainty,” “chunky,” “oversized,” “linen,” or “high shine,” your video should visually confirm it. When your keywords, photos, and video all match, buyers feel confident clicking and buying.
Common Etsy listing video problems and quick fixes
Upload errors, file compatibility, and compression
App vs desktop upload workflow tips
If your Etsy listing video won’t upload, fails partway through, or looks blurry after posting, it’s usually one of three things: file size, file format/codec, or an unstable connection during upload.
Start with the fast fixes:
- Check the basics first: Confirm your clip is within Etsy’s limits (3 to 15 seconds, up to 100 MB) and saved in a common format like MP4 or MOV. Etsy’s official requirements are listed in their guide to adding a listing video.
- Re-export instead of re-editing: If the file is “unsupported,” export a fresh copy as MP4 (H.264 is the safest choice in most editors). Avoid odd frame rates and extreme slow motion.
- Compress gently: If your video is too large, lower the bitrate slightly before lowering resolution. You usually want to keep the clip looking clean at typical Etsy viewing sizes, not pixelated or smeary.
- Fix “blurry” video: Blur often comes from low light (your phone raises ISO and softens detail) or motion. Refilm with brighter light and slower movement. Also make sure your lens is clean.
For workflow, try switching where you upload:
- If the app upload fails, save the video to your camera roll, then upload from a desktop browser. Desktop uploads can be more reliable for larger files.
- If desktop upload stalls, try the Etsy Seller app on a strong Wi‑Fi connection, or upload from a different browser (Chrome and Safari tend to be the most stable).
- If you keep seeing errors, rename the file (simple letters and numbers), then try again. Some devices create filenames with special characters that occasionally cause issues.
When you’re troubleshooting, change one thing at a time. That makes it easier to pinpoint whether the issue is the file itself or the upload method.
Related posts
Keep reading
Etsy Featured Listings: How to Curate Your Shop Homepage
Etsy featured listings help spotlight bestsellers on your Shop Home; pick 4 (or sections), order them for cohesive photos, and rotate a queued set for seasons.
Selling Jewelry on Etsy: Metal Disclosure and Allergy Considerations
Selling jewelry on Etsy: List exact metals, flag nickel sensitivity, and support hypoallergenic wording with supplier docs or testing to reduce buyer issues.
How to Use Etsy “Materials” and “Occasion” Fields Strategically
Etsy Materials and Occasion fields can boost visibility when chosen for buyer filters; match category, avoid guesswork, and align tags with real intent.

Etsy SEO Tips to Rank Higher in Search
Happy Etsy SEO tips for sellers: master keywords, titles, tags, photos, reviews, free shipping, and conversions to rank higher in Etsy search and boost sales.
Batch Shipping on Etsy: A Simple System
Streamline batch shipping on Etsy with a simple system that saves time, cuts postage costs, automates labels, and boosts order accuracy for happy repeat buyers.
How Many Photos Should an Etsy Listing Have?
Discover exactly how many photos your Etsy listing really needs, with winning examples and photo ideas to boost clicks, buyer trust, and sales.