How to Create a Quality Control Checklist for Etsy Orders

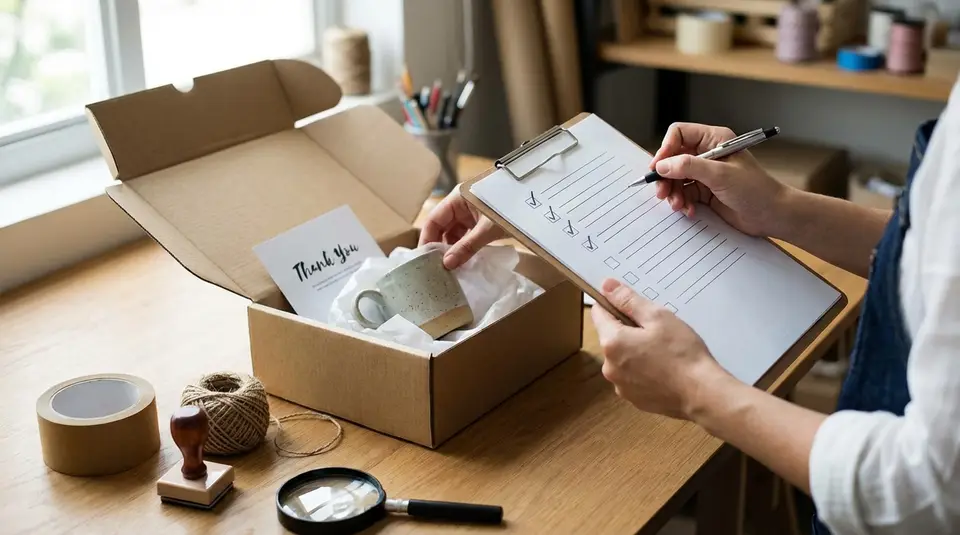
A quality control checklist turns Etsy fulfillment from a stressful memory game into a repeatable routine that protects your reviews, saves remake time, and keeps orders consistent as you scale. Start by confirming the buyer’s exact variation and personalization details, then inspect the finished item for common issues like wrong color, sizing, loose parts, scratches, or uneven print or stitching. Next, verify the packing slip against what’s in the box, double-check the shipping label name and address, and make sure any gift message, coupon, care card, or thank-you note matches what you intended to send. The easiest mistake to miss is the one step that should happen after everything is packed but before you seal it.
Pre-shipment order review steps that prevent Etsy mistakes
Confirm payment, address, and buyer notes
Before you touch supplies or start printing labels, open the order and confirm it’s actually ready to fulfill. On Etsy, that usually means checking the order status and payment, then reviewing the shipping address exactly as it appears.
Slow down on the address. Look for apartment numbers, suite letters, and “line 2” details that are easy to miss. If anything looks off (missing unit number, obviously incomplete street, or a name mismatch that suggests a gift), message the buyer for confirmation before you ship.
Then read everything the buyer left you. Check the order message, any note at checkout, and any message thread tied to the order. These small notes are where buyers often add timing requests, gift messages, or clarification that changes what should go in the box.
Verify processing time and ship-by date
Next, confirm your processing time and the order’s ship-by date, then plan your work around that deadline. Etsy calculates a ship-by date based on the processing time you set, and that date is what buyers see on their receipt. If your processing time is too short for the week you’re having, it’s better to adjust early than ship late. The Etsy guidance on processing times and ship-by dates is worth reviewing if you are rebuilding your workflow.
If you realize you cannot meet the ship-by date, communicate right away. Get buyer agreement on a new timeline before making changes, and keep the order notes clear for your own records.
Flag personalization or custom requests early
Personalized and custom orders need a separate “pre-flight check.” Pull the exact spelling, capitalization, dates, and any required formats (like “ALL CAPS” or “MM/DD/YYYY”) before you start production. If the buyer’s instructions are ambiguous, ask one clean question and wait for a reply.
A simple rule helps prevent remakes: never begin a custom step until you can point to one single “source of truth” for the personalization text, whether that’s the personalization box, a message confirmation, or a proof you sent and the buyer approved.
Order accuracy and product quality checks for handmade items
Match SKU, variation, quantity, and materials
Start with a straight match between what was ordered and what you made. Confirm the SKU (if you use one), the chosen variation (size, color, finish, scent, fabric, hardware, etc.), and the quantity. If you offer upgrades like gift wrap, rush processing, or premium materials, verify those add-ons are reflected in the item you’re about to ship.
For handmade work, materials are where “almost right” turns into a return. Do a quick materials check against your listing and your internal recipe: correct blank, correct stain or glaze, correct chain length, correct paper stock, correct thread type, correct clasp, correct backing, and so on. If you batch-produce, spot-check that this specific order did not get swapped with a similar variation.
Inspect workmanship and finish against your listing
Now compare the finished item to what your listing promises. Use your listing photos and description as your quality standard, not your memory. Look for the issues that buyers notice first:
- Surface flaws (scratches, scuffs, fingerprints, dust in resin, lint in fabric)
- Structural problems (loose jump rings, weak seams, wobbly bases, peeling vinyl)
- Function checks (zippers, clasps, lids, moving parts, fit and sizing)
- Print and color consistency (banding, fading, misalignment, color shifts)
If it’s a set, lay out every piece and confirm they visually match. Consistency matters as much as perfection.
Photo-check personalized details before packing
For personalization, do a fast “proof photo” check before it goes in the box. Zoom in and verify spelling, capitalization, date format, and alignment. This takes seconds and gives you a clear record of what you shipped if there’s ever a dispute.
Verify inserts, accessories, and care instructions
Finally, verify everything that should ship with the product. That can include spare parts, cords, earring backs, instruction cards, care cards, authenticity or materials info, and any branded insert you consistently use. If your listing implies something is included, make sure it’s actually in the package.
A good habit is to keep a short “what goes in the box” checklist per product type, so you are not reinventing this step on every order.
Packaging quality steps to avoid damage in transit
Choose protective materials for your product type
Packaging is part of quality control because it protects the work you just inspected. Start by matching protection to the product’s real risk: crushing, bending, moisture, abrasion, or temperature sensitivity.
For fragile or rigid items, prioritize a sturdy box with enough void fill so the item cannot move when you gently shake the package. Bubble wrap, foam, molded inserts, and corrugated dividers help prevent impact damage. For flat goods like prints and stickers, use rigid mailers or chipboard backing to prevent bends, and add a plastic sleeve if moisture is a concern. For textiles, keep lint and moisture out with a clean poly bag or tissue wrap before cushioning.
If you ship high-value items, consider double-boxing. The goal is simple: the item should arrive in the same condition it left your workspace.
Label fragile items and seal packages securely
If the contents can break, mark the package as fragile, but do not rely on that label as protection. The internal packing has to do the heavy lifting.
Seal every seam that can pop open. Use strong packing tape, and apply it with firm pressure so it bonds cleanly. Reinforce the bottom of heavier boxes with an “H-tape” pattern. For poly mailers, press the adhesive strip firmly and add tape over the closure for extra insurance if the package is bulky or the contents have corners.
Before you print the label, do one last check: nothing sharp should be able to puncture the outer packaging during transit.
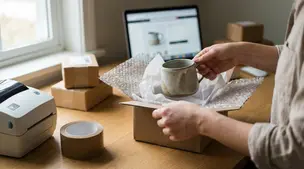
Add a clean packing slip or order receipt
Include a clean packing slip or order receipt so the buyer can quickly confirm what they received, especially for multi-item orders or gifts. Keep it readable, unwrinkled, and free of workshop debris like glitter, pet hair, or smudges.
If you add a small thank-you note, care instructions, or a coupon code, treat it like part of your standard insert kit. Consistency here supports a “professional shop” feel and reduces messages from buyers who are unsure how to use or care for the item.
Shipping label and tracking steps inside the Etsy workflow
Buy the correct service, weight, and dimensions
Treat the shipping label as part of your quality control checklist, not an admin task. A wrong weight, wrong package type, or wrong service can mean postage due, returned packages, or delivery delays that the buyer blames on you.
Before you buy the label in Etsy, confirm three things match what’s physically packed:
- Service level (Ground, Priority, etc.) matches what the buyer paid for and what you intend to use.
- Package weight is the packed, sealed weight, not the product-only weight.
- Dimensions match the actual box or mailer size, especially for thick mailers or larger boxes.
If you ship similar items often, saved package presets can speed this up, but still spot-check when you change packaging materials or add inserts.
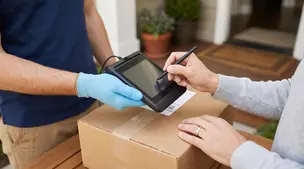
Add tracking and confirm carrier acceptance
If you buy shipping labels on Etsy, tracking is typically added automatically. If you ship another way, add the tracking number and carrier when you complete the order. Etsy’s steps for adding tracking and completing an order are worth following closely, especially if you’re doing this from the app.
For your own protection, confirm the package is actually accepted by the carrier. A counter receipt, kiosk receipt, or a first scan helps if a buyer claims the order never shipped. If you hand packages to a pickup driver, consider scanning them in at the counter for higher-risk orders.
Mark the order complete with the right ship date
When you complete the order, set the ship date to the date you expect to hand the package to the carrier. Etsy can delay the buyer’s shipping notification until that ship date, and you can set it up to 3 days in the future. Choose carefully so you don’t create an expectation the tracking cannot support.
Buyer messaging touchpoints that improve service metrics
Send an order confirmation or personalization recap
A short confirmation message can prevent most “I thought it would be…” issues before they turn into a return or a bad review. You do not need to message every buyer for every order, but it’s smart when the order includes personalization, multiple variations, or anything that’s easy to misread.
Keep it simple and specific. Restate the key details you will follow (variation, size, color, personalization text, and any gift note). If you offer proofs, say what to expect and what happens if they do not reply by a certain time.
This does two things: it reassures the buyer, and it creates a clear written record inside Etsy Messages if there’s confusion later.
Proactive updates for delays or address issues
If something might push you past your processing time, message early. Buyers usually accept a delay when they feel informed and in control. Offer a clear choice: approve a new ship date, switch to a faster shipping upgrade (if available), or cancel and refund if timing is critical.
For address issues, avoid guessing. Ask the buyer to confirm the full shipping address exactly as it should appear. Do not rewrite it yourself unless they explicitly approve the change in Messages. This one step reduces “delivered to the wrong place” headaches.
Respond to messages within Etsy time expectations
Fast replies are a measurable Etsy quality signal. Etsy’s customer service standards include replying to at least 80% of first messages in a thread within 48 hours, and Star Seller targets are tighter (95% within 24 hours). Auto-replies count as a response, so setting one up during busy periods can protect your response rate while you prepare a full answer. For the official definitions and thresholds, see Etsy’s Customer Service Standards.
Handling mistakes, refunds, and documentation for repeatable QA
Fixing damaged, missing, or incorrect items fast
Mistakes happen, even with a strong Etsy quality control checklist. The difference is how fast you diagnose the problem and how cleanly you resolve it.
When a buyer reports an issue, triage it into one of three buckets: damaged in transit, missing item/part, or incorrect item (wrong variation, wrong personalization, wrong quantity). Ask for the minimum info you need to act quickly: a clear photo of the issue, the packaging (if damaged), and a photo of the packing slip if something is missing.
Then choose a resolution and timeline. If you can remake and reship fast, tell the buyer the ship date and what tracking they’ll receive. If the fix would take too long, a refund is often the least painful outcome for both sides.
Refund, replacement, and case prevention steps
Your first line of defense is clarity and speed in Etsy Messages. Confirm what went wrong, state what you will do, and keep every promise you make. If you agree to a return, exchange, or replacement in Messages, treat it like a written agreement and follow through.
Also know how Etsy’s case flow works. Buyers typically start with a Help request, and then they may open a case after waiting at least 48 hours. For qualifying orders, Etsy may cover refunds under its Purchase Protection for Sellers, but eligibility depends on factors like shipping on time and providing valid tracking. For orders that don’t qualify, assume you are responsible for making it right.
A practical prevention habit: when you notice a repeat mistake (like swapped variations or missed inserts), add one line to your checklist that forces a catch before sealing the package.
Recordkeeping for photos, receipts, and shipment proof
Documentation is what makes quality control repeatable. It also protects you if a buyer opens a case.
Keep a simple record set for higher-risk orders (expensive, personalized, one-of-a-kind, or tight deadlines):
- Product photo before packing (and a close-up of personalization)
- Photo of the packed contents before sealing (especially multi-item orders)
- Shipping receipt or acceptance scan, plus tracking number
- Notes on any buyer confirmations (like approved spelling or address changes)
You don’t need a complicated system. The goal is to be able to answer, quickly and confidently, “What did I ship, when did I ship it, and what proof do I have?”
Related posts
Keep reading
Should You Require Signature Confirmation for Etsy Orders?
Learn when to require signature confirmation for Etsy orders to prevent package theft, protect high-value shipments, keep tracking valid, and boost buyer trust.
Shipping Insurance for Etsy Orders: Is It Worth It?
Discover when Etsy shipping insurance truly pays off, comparing seller protection, USPS coverage, Shipsurance rates, order value risks, and smart refund peace-of-mind.

How to Avoid Underpaying Postage on Etsy Orders
Stop surprise USPS adjustments and postage-due notices with accurate Etsy shipping profiles, correct package weights, dimensions, zones, and tracking every time.

How to Handle Customs Fees and VAT for International Etsy Orders
Learn how Etsy sellers can calculate customs fees, charge VAT at checkout, avoid double taxation, set DDP vs DAP shipping, and keep international buyers happy.

How Etsy Payments Work for Sellers
Discover how Etsy Payments pays sellers—payout schedules, payment methods, fees, taxes, deposits, and tips to keep your handmade shop cash flow happy.

How to Organize Your Etsy Product Photos and Files (Folder System)
Organize Etsy product photos with a simple folder tree, SKU-based filenames, and versioning tips so listing images and download files stay tidy everywhere.