
General
Etsy Featured Listings: How to Curate Your Shop Homepage
Etsy featured listings help spotlight bestsellers on your Shop Home; pick 4 (or sections), order them for cohesive photos, and rotate a queued set for seasons.
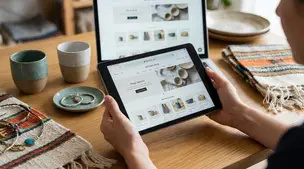
I’m a newer Etsy seller and I’m struggling with product photos. I’ve been using an iPhone 15 Pro, but my images still look dull and unprofessional once I upload them to my listings.
Is an iPhone enough for strong Etsy photos if I improve lighting and setup, or is it worth switching to a dedicated camera? What equipment or basic settings would you recommend either way?
Hi! An iPhone 15 Pro is absolutely “enough” for strong Etsy product photos—most dull-looking listings are a lighting + setup + editing/exports issue, not a “you need a DSLR” issue. A dedicated camera can help in specific situations (very reflective items, extremely consistent batch work, heavy background blur, color-critical work), but you’ll usually get a bigger quality jump by improving light, controlling reflections, and making sure your final files look good after Etsy compresses them.
A few common culprits:
If you buy nothing else, do these first:
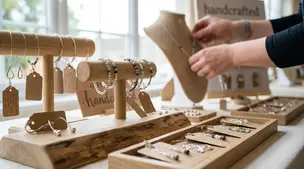
If your items are shiny (jewelry, glass, acrylic, glossy ceramics), a light tent (photo box) can instantly make them look more professional because it softens reflections and evens out highlights.
Equipment that’s actually worth it:
Simple iPhone shooting settings/tips:
Quick lighting placement that flatters most products:
Consider switching (or adding a camera) if:
Starter camera setup that’s practical for Etsy:
Basic camera settings (simple, repeatable):
If you tell me what you sell (jewelry, prints, candles, clothing, etc.) and whether you shoot in daylight or at night, I can suggest a lighting/setup that fits your product type and space.
Related questions
I sell digital downloads on Etsy and a buyer paid $6 for a $5 item, but the tax line is $0. What else could cause this, and can buyers add extra at checkout?
I shipped an Etsy international order via USPS, but tracking has been stuck for weeks after acceptance. What can I do, and when should I refund or replace?
My Etsy order tracking shows delivered, but the buyer says it wasn’t received. What should I do next to handle a refund, replacement, or claim?
I sell physical items on Etsy and a buyer opened a “not delivered” case, but tracking shows delivered. How do I confirm tracking and will an open case hurt my shop?
I’m setting up an Etsy shop and deciding between POD T-shirt designs and digital portrait commissions. Should I offer both in one shop or focus on one?
Related posts
Etsy featured listings help spotlight bestsellers on your Shop Home; pick 4 (or sections), order them for cohesive photos, and rotate a queued set for seasons.
Selling jewelry on Etsy: List exact metals, flag nickel sensitivity, and support hypoallergenic wording with supplier docs or testing to reduce buyer issues.

Etsy Materials and Occasion fields can boost visibility when chosen for buyer filters; match category, avoid guesswork, and align tags with real intent.

Happy Etsy SEO tips for sellers: master keywords, titles, tags, photos, reviews, free shipping, and conversions to rank higher in Etsy search and boost sales.

Price custom orders on Etsy with clear quotes: total up materials, labor, fees, and shipping, set deposits and revision limits, and protect turnaround time.

Product spec sheets for Etsy items record SKUs, materials, measurements, photos, packaging, and QC checkpoints so reorders reliably match what customers expect.