
General
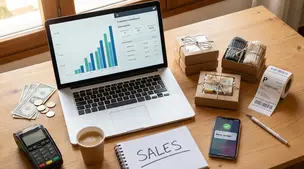
How Much Money Can You Make Selling on Etsy?
Discover realistic Etsy income ranges, profit margins, fees, and proven tips to boost sales so you can grow your handmade or digital product shop confidently.
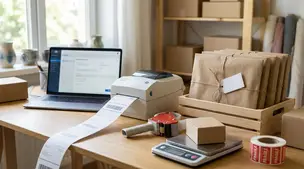
I run an Etsy shop and want to improve my unboxing experience with branded thank-you cards and stickers. I can make simple designs in Canva, but they still look a little DIY, and I’m considering using a tool that generates packaging designs from an existing logo.
Are auto-generated branding tools reliable for producing truly print-ready files for inserts, or is it better to start from professional templates and customize them? If I go the template route, what should I look for to make the final result feel more polished?
Hi! You can absolutely get “designer-level” Etsy packaging inserts without hiring a designer—but in my experience, auto-generated branding tools are better for quick concepts than for truly print-ready, polished pieces. If you already have a logo and a general vibe, starting from a high-quality professional template and customizing it usually gives you the cleanest result with fewer printing surprises.
Auto-generated branding tools: when they work (and where they don’t)
If you use an auto tool, treat the output like a draft. Before you print, you’ll still want to verify sizes, bleed, resolution, and export settings based on your printer’s specs.
If you go the template route, here’s what makes it look professional
1) Choose templates built for print (not just pretty mockups)
Look for templates that clearly mention:
2) Make “spacing” your #1 upgrade
Most DIY-looking inserts aren’t “bad designs”—they’re cramped. Try:
3) Limit your fonts and tighten typography
A polished look usually means:
4) Use your logo the right way
If your logo looks a little fuzzy anywhere, it’ll read as DIY in print.
5) Color: keep it simple and printer-friendly
To feel branded without looking homemade:
6) Add one “premium” detail instead of more graphics
This is a big one: one elevated touch beats extra clipart every time.
Examples:
7) Finish + paper can do half the work
Even a simple Canva design can look high-end if printed well:
Quick workflow that usually works best
If you tell me what size you want for the thank-you card and stickers (and whether you print at home or use a print shop), I can suggest the exact export settings and a simple layout formula that consistently looks “not DIY.”
Related questions
I sell physical items on Etsy and a customer bought 3 variations in one order, but Etsy prompts me to buy 2 shipping labels—can I ship in one box without affecting tracking?
I opened a new Etsy shop and Etsy is holding my funds for 14 business days. Is this a temporary reserve for new shops or a permanent payout schedule?
I’m a newer Etsy seller and need to ship two separate Etsy orders together. Can I buy one shipping label and mark both orders shipped with tracking?
I sell digital artwork on Etsy and keep seeing digital downloads labeled “hand drawn” that look AI-generated. What’s the best way to report them to Etsy?
I’m sending opt-in onboarding email marketing emails and one message with a youtu.be link keeps landing in Gmail spam—does link shortening/click tracking hurt deliverability?
Related posts
Discover realistic Etsy income ranges, profit margins, fees, and proven tips to boost sales so you can grow your handmade or digital product shop confidently.

Learn how to break even faster on Etsy with smart pricing, fee-cutting tactics, bestseller research, SEO-powered listings, and affordable Etsy Ads strategies.
Discover why selling on Etsy boosts your handmade brand visibility, low startup costs, built-in traffic, loyal buyers, and flexible, low-risk income.
Discover exactly what you can sell on Etsy—from handmade crafts and digital downloads to vintage treasures and craft supplies—and start growing a joyful shop today.

Discover how to create high-converting Etsy listing videos that boost clicks, build buyer trust, showcase product details, and quickly increase your sales.
Streamline batch shipping on Etsy with a simple system that saves time, cuts postage costs, automates labels, and boosts order accuracy for happy repeat buyers.