

General
How Many Photos Should an Etsy Listing Have?
Discover exactly how many photos your Etsy listing really needs, with winning examples and photo ideas to boost clicks, buyer trust, and sales.
I’m a newer Etsy seller and I’m struggling to get clean, sharp product photos for my listings. I’ve been using an iPhone (a recent model), but my pictures still look dull and unprofessional.
Is an iPhone realistically enough for good Etsy listing photos, or should I consider buying a dedicated camera? If an iPhone can work, what are the most important settings or setup changes (lighting, background, editing) to improve results?
Hi! Yes—an iPhone is realistically enough to create clean, sharp, professional Etsy listing photos (many full-time sellers shoot on phones). The “dull” look almost always comes from lighting and focus/exposure choices, not the lack of a DSLR—so I’d fix your setup first before spending money on a dedicated camera.
1) Lighting (this is 80% of the result)
2) Stabilize + control focus/exposure (this fixes “not sharp”)
3) Background + styling (clean, not cluttered)
4) Composition that sells on Etsy
5) Editing (quick, consistent, not overdone)
Edit every photo lightly so your Etsy listing looks cohesive:
If you want a simple “upgrade path” without buying a DSLR, prioritize in this order: (1) soft daylight + reflector, (2) phone tripod, (3) clean background sweep, (4) consistent editing.
When a dedicated camera actually makes sense
Consider a DSLR/mirrorless only if you’ve already nailed lighting/stability and still need something your iPhone can’t do well—like extreme close-ups (macro) for tiny details, very consistent studio results at high volume, or tricky reflective products where you want more control. Even then, lighting will still matter more than the camera body.
If you tell me what you sell (jewelry, candles, stickers, clothing, etc.) and where you’re shooting (window light, kitchen table, lightbox), I can suggest a specific iPhone setup and the best angles for your exact product.
Related questions
I sell on Etsy and want to generate staged lifestyle listing photos from one product photo. Is this a good approach, and what should I watch out for?
I’m updating my Etsy listing photos and unsure what image size and aspect ratio to upload so they don’t get awkwardly cropped on mobile, search, and listing pages.
I sell physical products on Etsy and buyers worry about customs/VAT or carrier fees. Should I repeat import duty info in listing photos, and how?
I run an Etsy shop and want to know if adding alt text to listing photos improves Etsy SEO, search ranking, or sales enough to be worth the time.
I added new Etsy listings and saw a short burst of views, then a drop. How long should I wait before changing titles, tags, or photos to improve traffic?
I’m starting an Etsy shop and deciding between POD apparel and digital portrait commissions. Can I sell both without hurting Etsy SEO or confusing buyers?
Related posts
Discover exactly how many photos your Etsy listing really needs, with winning examples and photo ideas to boost clicks, buyer trust, and sales.

Revive dead Etsy listings with smart SEO, renewal timing, fresh photos and keywords that boost traffic, restore visibility and get your shop selling again.

Learn how to create private Etsy custom listings step by step, reserve items for one buyer only, manage custom orders, protect pricing, and boost shop sales.
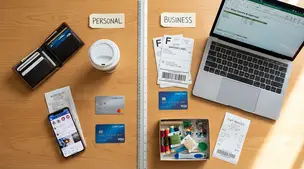
Separate personal and business finances by using a dedicated bank account and card, tracking Etsy fees and payouts, and keeping clean, tax-ready records.
Product spec sheets for Etsy items record SKUs, materials, measurements, photos, packaging, and QC checkpoints so reorders reliably match what customers expect.

Notion for Etsy sellers: organize tasks, listing tweaks and notes in one place, with database views for today and this week plus an ideas inbox, at a glance.