

General
How to Create On-Brand Etsy Listing Graphics (Without Overdesigning)
Etsy listing graphics that stay on-brand: clean text hierarchy, consistent colors and fonts, plus fast Canva templates for mobile-ready, uncluttered thumbnails.
I’m new to selling on Etsy, and I’m working on improving my product photos for a mix of items like home decor pieces, door signs, and hats.
I’m looking for an attractive, easy-to-use backdrop option around 24x24 inches that I can set up at home, and I’m not sure whether a ring light is necessary or if natural light is enough.
What backdrop materials or setup works best for photographing a variety of products like these, and what kind of lighting setup should I start with?
Hi! For a mix like home decor pieces, door signs, and hats, the easiest “best all-around” Etsy photo setup at home is a simple 24x24 backdrop surface (matte, non-reflective) paired with soft side lighting—natural window light can absolutely be enough to start, and I’d skip a ring light as your main light for product photos (it tends to create flat lighting and weird circular catchlights on glossy finishes).
If you want one backdrop setup that works for almost everything
A super easy “works every time” backdrop build (no fancy gear)
Lighting: start simple, then upgrade if needed
Natural light is enough if you can consistently shoot near the same window and time of day. If your photos look different every time (cloudy day vs sunny day), that’s when adding artificial light is worth it.
If you want an easy starter lighting kit (more consistent than a ring light)
Why I wouldn’t start with a ring light (especially for your products)
How to shoot your specific items
Two quick tips that instantly improve Etsy product photos
If you tell me whether you’re shooting with a phone or a camera, and what your products are made of (matte wood, glossy paint, embroidered hats, etc.), I can recommend the best exact background colors and where to place the lights to avoid glare.
Related questions
I sell digital downloads on Etsy and a buyer paid $6 for a $5 item, but the tax line is $0. What else could cause this, and can buyers add extra at checkout?
I shipped an Etsy international order via USPS, but tracking has been stuck for weeks after acceptance. What can I do, and when should I refund or replace?
My Etsy order tracking shows delivered, but the buyer says it wasn’t received. What should I do next to handle a refund, replacement, or claim?
I run an Etsy shop and a buyer wants a refund after the order shipped because they found a cheaper option. What’s the standard Etsy approach?
I’m starting an Etsy shop for low-cost digital items and services and want to know if I can earn a small amount in 1–2 months after fees and traffic.
Related posts
Etsy listing graphics that stay on-brand: clean text hierarchy, consistent colors and fonts, plus fast Canva templates for mobile-ready, uncluttered thumbnails.
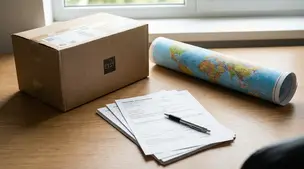
Ship Etsy orders worldwide with confidence using clear customs forms, accurate HS codes, duties, taxes, and tariff info to avoid delays and surprise fees.

Etsy image alt text that names materials, size, and key views, replaces Etsy's auto descriptions, and improves accessibility plus Google image search.

Favorited item coupons on Etsy: set targeted offers in Shop Manager, choose discount and duration, and avoid common issues like opt-outs and timing delays.

Referral incentive for Etsy customers: set up trackable links and shop coupons, define terms, and stay within Etsy policies for cards, email, and social.
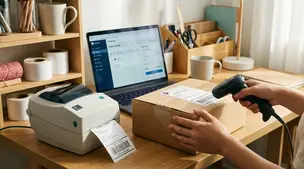
Barcodes and labels streamline picking, packing, and shipping for Etsy orders with simple SKU setup, scanner tips, label printers, and error-proof workflows.